8-1: Source Address Persistence 사용
Task 1 - Source Address Persistence Profile 생성
1) Local Traffic > Profiles > Persistence 페이지 선택 후 Create 클릭합니다.
2) 생성 값을 넣어줍니다.


3) Virtual Server List 페이지에서 http_virtual을 클릭합니다. Resource 클릭 후 Default Persistence Profile을
custom_source_address로 바꾼 후 Update합니다.

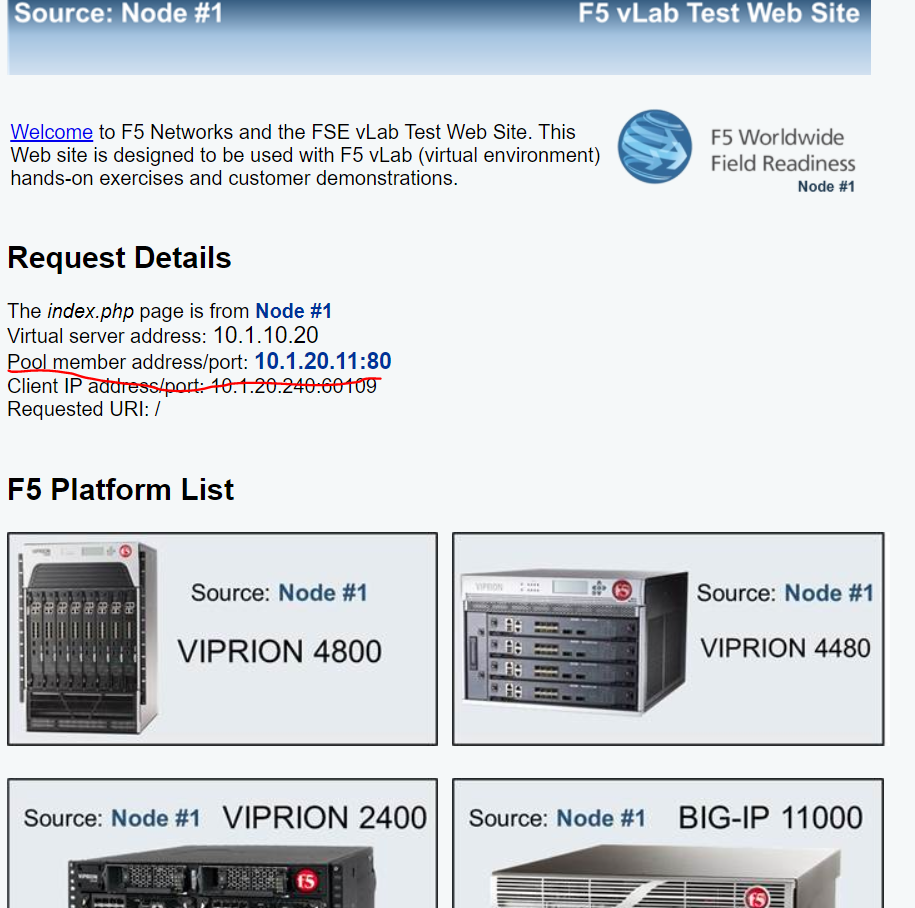
4) 확인. 동일한 Pool Member address로 페이지 호출합니다.(고정 호출)

Task 2 - Source Address Persistence Record 공유
1) LAMP 7에서 10.1.10.20을 접속하고, External에서도 10.1.10.20에 접속합니다.
2) custom_source_address의 Timeout값을 45로 Prefix Length 값을 16으로 변경 합니다.

3)확인합니다. 동일한 고정 Pool Member를 공유하고 있습니다.


4) Putty에 접속하여 커맨드 라인으로도 설정할 수 있습니다.
tmsh create ltm pool port_8081_pool members add { 10.1.20.11:8081 { address 10.1.20.11 } }
tmsh create ltm persistence source-addr port_8081_source_addr timeout 240 mask 255.0.0.0
tmsh create ltm virtual port_8081_virtual destination 10.1.10.20:8081 ip-protocol tcp profiles add {
tcp { } } pool port_8081_pool persist replace-all-with { port_8081_source_addr { default yes } }
exit
8-2: Cookie Persistence 사용
Task 1 - Cookie Persistence Profile 생성
1) Local Traffic > Profiles > Persistence 페이지에서 Create 클리합니다.
2) 생성 값을 입력합니다.


3) Virtual Server List 페이지에서 http_virtual 클릭 후 Resources페이지 이동 후
e Default Persistence Profile list에서 custom_cookie 선택 후 Update
4) 등록에 실패 했습니다.
→ Cookie Persistence에는 HTTP 또는 Virtual Server에 연결할 FastHTTP profile이 필요하다고 합니다.
5) Putty를 활용하여 커맨드로도 만들 수 있습니다. 10.1.10.240에 접속 후 커맨드를 입력해줍니다.
tmsh delete ltm virtual port_8081_virtual
tmsh delete ltm pool port_8081_pool
tmsh delete ltm persistence source-addr port_8081_source_addr
tmsh delete ltm persistence cookie port_8081_cookie
6) 결과 확인
Q: Was the update successful?
A: No
Q: Why or why not?
A: Cookie persistence requires an HTTP profile.
Q: What pool member are you persisting to?
A: Answers will vary.
Q: Is there a persistence record for this session?
A: No
Q: Why or why not?
A: Persistence records aren’t used with cookie persistence.
8-3: View Persistence with Disabled and Offline Pool Members
Task 1 - Source Address Profile and the Virtual Server 업데이트
1) Local Traffic > Profiles > Persistence 페이지에서 custom_source_address 클릭합니다.
2) Timeout 값을 100으로 수정 후 Update합니다.

3) Virtual Server List 페이지에서 http_virtual 클릭 후 Resources에 들어갑니다.
Default Persistence Profile list 에서 custom_source_address을 선택 후 Update합니다.

Task 2 - – View the Effects of Disabled and Offline Pool Members
1) 10.1.10.20에 접속 후 새로고침을 합니다.
Q: Which pool member are you persisting to? > 10.1.20.11:80
2) Pool List > Members 페이지에서 Pool Member를 Disable로 설정합니다.

Q:Can a disabled pool member service client requests? > 요청 불가능
3) 다시 Enable로 수정 후 새로고침을 합니다.
Q:Did the persistence session go back to the original pool member? > 네, 원래 Pool Member로 구성됐습니다.
4) 확인합니다.
같은 Pool Member를 사용하며, offline일 시 Service Client Request를 할 수 없습니다.
또한 지속성 세션 재설정 시 원래 Pool Member로 돌아갔습니다.
8-4 생략합니다. http_virtual2 생성 실습을 하지 않아서 실행 할 수 없습니다.
'기타 > 인턴활동' 카테고리의 다른 글
| Lesson 6 - F5를 활용한 Profiles 실습 (0) | 2021.07.21 |
|---|---|
| Lesson 9 - F5를 활용한 Support SSL 실습 (0) | 2021.07.21 |
| Lesson 7 - F5를 활용한 Performance Profiles 실습 (0) | 2021.07.21 |
| Lesson 5 - Health Monitors 실습 (0) | 2021.07.20 |
| Lesson 3 - F5 를 활용한 Virtual Serevers 실습 (0) | 2021.07.19 |